💻 API Example Project Tutorial
This guide was designed with version 6.3.0 and Paper 26.1.2 in mind.
Let's create our first Project using the NotQuests API!
First Step: Adding the NotQuests API to your Project
First, create a libs folder in your project and add the NotQuests jar to it. You can also use our GitHub packages repository, but it doesn't work that well because you'll need to generate your own GitHub secret key and can't publish it. As for JitPack, they don't support Java 25.

Assuming you are using gradle as your build tool (you should), then head to your build.gradle file and add the following to your dependencies:
dependencies {
    compileOnly 'io.papermc.paper:paper-api:26.1.2-R0.1-SNAPSHOT'
    compileOnly files('libs/notquests-5.19.0.jar')
}
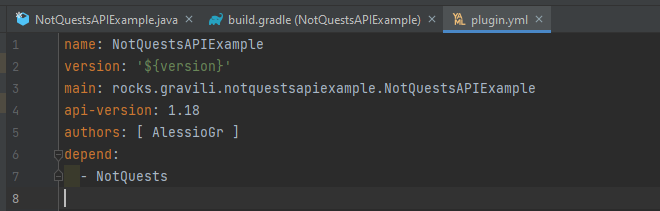
Next, open your plugin.yml and add NotQuests as a depend or softdepend. In our case, we'll add it as a depend:
Step 2: getting the NotQuests instance
NotQuests has one module for Spigot and one module for Paper. They're both very different and the Spigot module is much older. In this Tutorial, we'll be creating our own Objectives, Conditions and Actions using the Paper module only. They will only work if the Server who is using your plugin uses Paper. On spigot, the NotQuests.getInstance() of the paper module will return null. Please check that before registering anything.
Since noone should be using Spigot anyways, that's fine. Don't worry, your plugin should still be able to load up on Spigot.
Make sure you only use the classes from the paper module:
Well, let's start by creating the (proper) NotQuests instance in our Main:
public final class NotQuestsAPIExample extends JavaPlugin {
private NotQuests notQuestsInstance;
@Override
public void onEnable() {
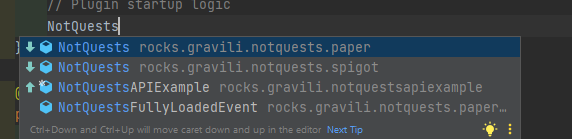
// Plugin startup logic
notQuestsInstance = NotQuests.getInstance();
}
@Override
public void onDisable() {
// Plugin shutdown logic
}
}
Cool. NotQuests barely uses any static stuff, so we'll be using the instance for basically everything.
Let's create an action and a condition (= requirement) via variables
In NotQuests you can create Conditions and Actions separately. However, it's also possible to create both at the same time using Variables!
If it's possible to use Variables, you should always use them. Only register Conditions and Actions directly if you can't do what you wanna do with Variables.
Let's create a variable for the player's food level. Create a new class called FoodLevelVariable and make it extend Variable<Integer>. The food level is an integer and the Variable class uses generics.
Then, implement all necessary methods using your IDE. It should look like this:
public class FoodLevelVariable extends Variable<Integer> {
    private final NotQuests main;

    public FoodLevelVariable(NotQuests main) {
        super(main);
        this.main = main;
    }

    @Override
    public Integer getValue(QuestPlayer questPlayer, Object... objects) {
        return null;
    }

    @Override
    public boolean setValueInternally(Integer newValue, QuestPlayer questPlayer, Object... objects) {
        return false;
    }

    @Override
    public List<String> getPossibleValues(QuestPlayer questPlayer, Object... objects) {
        return null;
    }

    @Override
    public String getPlural() {
        return null;
    }

    @Override
    public String getSingular() {
        return null;
    }
}
All we need to do is fill out the each and every method. Let's start with getValue. This method will be used for the Condition which is generated from this variable. Here, we need to return the player's current food level. Pretty simple:
@Override
public Integer getValue(QuestPlayer questPlayer, Object... objects) {
    return questPlayer.getPlayer().getFoodLevel();
}
Next, in setValueInternally, that's what's used internally for the action. By default, a variable only needs the getValue method filled out. Only SOME variables can also change the value. It works here, so let's fill it out:
@Override
public boolean setValueInternally(Integer newValue, QuestPlayer questPlayer, Object... objects) {
    questPlayer.getPlayer().setFoodLevel(newValue);
    return true;
}
Always return true there if the setting-of-the-value is successful. Now we need to enable setting the value in the constructor. Otherwise, the corresponding action will not be generated:
public FoodLevelVariable(NotQuests main) {
    super(main);
    this.main = main;
    setCanSetValue(true);
}
As for getPossibleValues, let's leave it at null. NotQuests will just use the default integer auto-completion there. For getSingular and getPlural, use this:
    @Override
    public String getPlural() {
        return "Food level";
    }

    @Override
    public String getSingular() {
        return "Food levels";
    }
And we're done! Now just register this variable in the onEnable method in your Main:
@Override
public void onEnable() {
    // Plugin startup logic
    notQuestsInstance = NotQuests.getInstance();
    if(notQuestsInstance != null){ //For Spigot compatibility
        notQuestsInstance.getVariablesManager().registerVariable("FoodLevel", FoodLevelVariable.class);
    }
}
Done! Let's see how it looks in-game. During startup, you should be able to see this "Registering Variable" line in the console:

That'd be how you create the condition:

And the action:

And if we execute it via /qa actions edit actionname4 execute:

For many simple values you can use the variable system. Not only is it easier, it also gives you access to the advanced comparison operators (like being able to use Math and other variables in the expression for Integer variables).
Let's create an Objective
Create the class called TakeDamageObjective and make it extend Objective. Then implement everything. It should look like this:
public class TakeDamageObjective extends Objective {
    private final NotQuests main;

    public TakeDamageObjective(NotQuests main) {
        super(main);
        this.main = main;
    }

    @Override
    public String getObjectiveTaskDescription(QuestPlayer questPlayer) {
        return null;
    }

    @Override
    public void save(FileConfiguration fileConfiguration, String initialPath) {

    }

    @Override
    public void load(FileConfiguration fileConfiguration, String initialPath) {

    }

    @Override
    public void onObjectiveUnlock(ActiveObjective activeObjective, boolean unlockedDuringPluginStartupQuestLoadingProcess) {

    }

    @Override
    public void onObjectiveCompleteOrLock(ActiveObjective activeObjective, boolean lockedOrCompletedDuringPluginStartupQuestLoadingProcess, boolean completed) {

    }
}
Let's already register it in our onEnable in our Main:
@Override
public void onEnable() {
    // Plugin startup logic
    notQuestsInstance = NotQuests.getInstance();
    if(notQuestsInstance != null){ //For Spigot compatibility
        notQuestsInstance.getVariablesManager().registerVariable("FoodLevel", FoodLevelVariable.class);
        notQuestsInstance.getObjectiveManager().registerObjective("TakeDamage", TakeDamageObjective.class);
    }
}
Now back to our TakeDamageObjective, just fill out each method. You can see how other Objectives do it here.
Then, you'll need to register and handle your own Bukkit events to add Progress (and eventually complete) your objective. For the internal objectives, I'm doing that here. Feel free to copy the boilerplate code.
I'll add a more explanatory tutorial on Objective Creation later, feel free to ask for help on our Discord. You can find the API example project on GitHub. Not that it might not have been updated to the latest NotQuests API yet.